
A Murphy bed can be a game changer for your living space. It lets you make the most of square footage by offering a bed that folds up into the wall when not in use. Whether you are outfitting a guest room, studio apartment, or multifunctional space, a properly installed Murphy bed adds both convenience and functionality.
When to Consider Professional Assistance
While many homeowners can complete a DIY project themselves, some situations may benefit from professional help. If your wall material is difficult to drill into or the installation seems too complex, a trained installer can ensure the job is done safely and correctly. Professional help with murphy bed installation can save time, guarantee a secure finish, and provide peace of mind with heavy or custom Murphy bed systems.
Why Murphy Bed Installation Requires Planning
Installing a Murphy bed is more than just putting together a piece of furniture. Because these beds are designed to be secured to a wall and used frequently, proper installation ensures both safety and long term performance.
A Murphy bed must be anchored to solid wall studs or structural supports. Failing to do this can lead to instability or damage to your wall during normal use.
Step 1: Prepare Your Space
Before starting the installation, prepare the room where your Murphy bed will be placed.
Clear the area of furniture, décor, electronics, and other obstructions. A clean workspace makes it easier and safer to handle large bed components during assembly and installation.
Measure the wall and ensure you have enough floor and ceiling clearance. Murphy beds require adequate room to extend fully, so confirming these dimensions before assembly will prevent last minute surprises or adjustments.
Step 2: Unbox and Inspect Parts
After preparing your space, unpack your Murphy bed kit.
Lay out all components and verify that each part matches the instruction manual. This pre-assembly check helps you identify missing pieces early and saves time during the actual build.
Inspect all parts for damage. If any pieces are damaged or missing, contact the supplier before moving forward.
Step 3: Assemble the Base and Frame
Begin the murphy bed installation by assembling the main frame of the bed.
Most Murphy bed kits include numbered panels and hardware that fit together following the manufacturer’s instructions. Start by connecting the base components and building the main structure.
Keep a level nearby during this step to ensure all connections are straight and aligned. A crooked frame can cause issues later when you mount the bed to the wall.
This step is typically the most time-consuming part of assembly, so take your time and follow each step carefully.
Step 4: Install Drawer Slides and Panels
Many Murphy bed models include storage drawers or built-in shelving. Installing these components correctly adds functionality and helps balance the unit.
Drawer slides are usually attached to specific panels and then mounted into the frame. Once slides are in place, secure the drawers according to the manual.
Take note of how the panels interlock with each part of the structure so that everything fits snugly and moves smoothly.
Step 5: Position and Anchor the Bed Cabinet
With the frame and movable parts assembled, it is time to position the Murphy bed unit against your chosen wall.
Use a stud finder or confirm stud locations manually, since the bed must be secured into structural studs or solid wall framing. Mounting into studs ensures the unit stays stable and safe during use.
Once positioned, anchor the bed cabinet to the wall using appropriate hardware such as lag bolts. Make sure the unit is level before tightening all fasteners.
This step is critical for safety and stability, so do not skip or rush through it.
Step 6: Attach and Balance Mechanisms
Murphy beds use lifting mechanisms, typically springs or pistons, to make opening and closing easier.
After anchoring the main cabinet, follow the manufacturer’s instructions to attach the lift hardware. These mechanisms are installed inside the frame and help manage the weight of the bed.
Once installed, test the opening and closing motion. If the bed is difficult to lift or closes too quickly, adjust the mechanism tension according to the instructions.
This balancing helps prevent strain on the hardware and ensures smooth operation over time.
Step 7: Install Bed Panels and Finishing Elements
With the mechanism in place, complete your Murphy bed installation by attaching the bed face panels.
These panels are the visible front of your Murphy bed when it is folded up. Fasten them securely and check that the bed opens and closes cleanly without rubbing or catching.
Take your time with this step, as alignment here affects both appearance and functionality.
Safety Tips for Murphy Bed Installation
Safety should be a priority throughout the process. Follow these key safety tips:
Helpful Practices
- Always have at least two adults during assembly and anchoring.
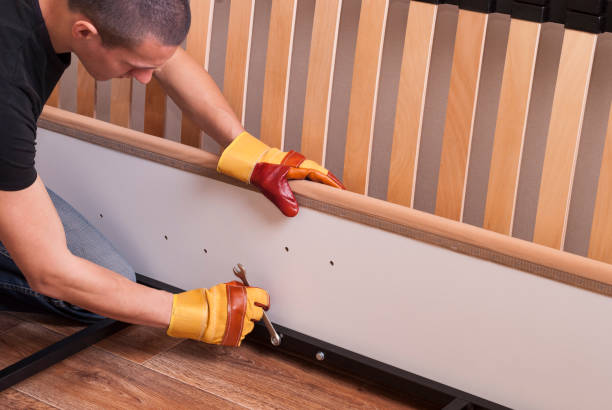
- Wear protective gloves and eyewear when handling hardware or drilling.
- Confirm wall stud locations to prevent improper anchoring.
- Read and follow the detailed instructions included with your Murphy bed hardware kit.
Working with heavy panels and lifting mechanisms can be challenging without help, so having a partner makes the task both safer and easier.
Common Issues and How to Avoid Them
Murphy bed installation projects sometimes encounter obstacles. Being prepared helps you avoid or address common problems.
Troubleshooting Tips
- Misaligned frames can cause improper movement Ensure all screws and panels are square before final tightening.
- If the bed is difficult to lift Check mechanism tension and follow adjustment instructions.
- Walls with unusual construction Concrete, brick, or metal studs may require special anchors or professional support.
Addressing these issues early prevents delays in completing your project.
Maintenance After Installation
Once your bed is installed, a bit of maintenance keeps it working well for years.
Periodically check screws, brackets, and mechanism components for tightness. Routine checks allow you to identify loose hardware before it becomes a bigger problem.
Clean the frame and surfaces with a dry cloth. Avoid exposing moving parts to moisture or debris.
These small habits help preserve both function and appearance.
Finishing Touches to Enhance Your Space
After installation, you can personalize your Murphy bed area to match your style. Consider adding shelves, artwork, or lighting around the unit.
Decor can make the bed blend seamlessly into your room when it is closed, giving you more usable space during the day.
Lighting near the bed can also improve comfort when you open and use it at night.
Enjoying Your New Murphy Bed
Completing a Murphy bed installation gives you a flexible and space-saving solution that can transform any room. With careful planning and proper steps, your Murphy bed will provide comfort, convenience, and style for years to come.
Whether you are hosting guests, creating a multifunctional space, or simply maximizing your home layout, a well installed Murphy bed is a smart addition to any home.


 Digital Transformation Through Insurance Business Process Outsourcing